
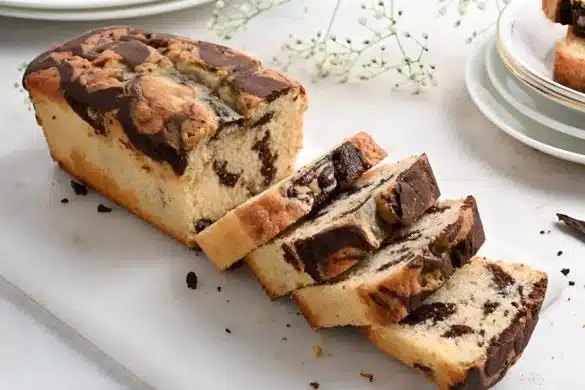
Chocolate Brownie Cake is one of those recipes that feels a bit magical because it starts on the stovetop rather than in a mixing bowl. You melt butter, sugars, and chocolate together until smooth, then fold in eggs and dry ingredients. The batter comes together quickly without any fancy equipment. I often make this when I want something more substantial than brownies but less fussy than a layered cake.
The texture sits right between the two, dense and moist with a tender crumb that holds its shape when sliced. It is the kind of dessert that disappears fast, especially when served warm with a scoop of vanilla ice cream.
About the Recipe
This recipe deserves a spot in your regular rotation because it skips the usual creaming method and relies on melted chocolate for structure and flavor. That means less time with a mixer and fewer dishes to wash. The combination of brown sugar and golden syrup adds a subtle caramel note that balances the cocoa without overwhelming it. You do not need special skills or equipment, just a heavy bottomed pan and a whisk.
The cake bakes in about 40 minutes and stays moist for days if stored properly. It is reliable enough for beginners but impressive enough to serve to guests.
Why you will love this recipe
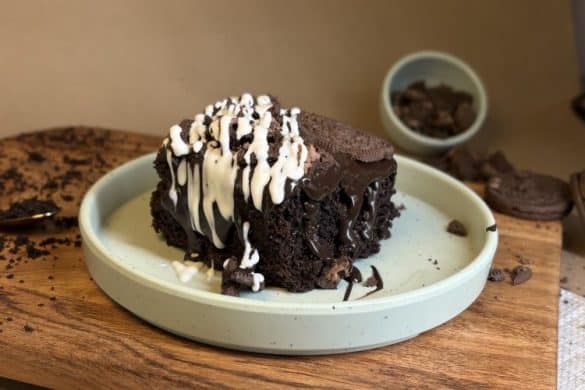
The stovetop melting step makes this cake come together faster than most from scratch desserts. You get a deep chocolate flavor without any grainy texture because the sugar dissolves completely before you add the other ingredients. The cake holds up well to variations too. I sometimes fold in chopped walnuts for crunch or swap half the cocoa for espresso powder when I want a stronger flavor.
Because it bakes in a single tin, you can frost it just or dust it with icing sugar and call it done. The texture is dense enough to slice cleanly but soft enough to feel indulgent, especially when it is still slightly warm from the oven.

Chocolate Brownie Cake
Cooking Tips
Keep the heat low when melting the chocolate mixture to prevent scorching. Stir gently and continuously until everything is smooth. Let the mixture cool for a few minutes before adding the beaten eggs so they do not scramble on contact. Line your cake tin with parchment paper even if you grease it because this batter is sticky and the paper makes removal much easier.
Check for doneness at 30 minutes by inserting a skewer into the center. It should come out with a few moist crumbs but not wet batter. Overbaking will dry out the cake, so pull it when it still feels slightly soft in the middle.
Serving and Storing Suggestions
This recipe serves 10 to 12 people depending on how thick you cut the slices. Total prep and baking time is about one hour, including cooling. Serve it warm with vanilla ice cream or whipped cream, or let it cool completely and dust with icing sugar. The cake stays fresh at room temperature for two days if wrapped well, or you can refrigerate it for up to five days.
It also freezes beautifully for up to three months. Just wrap individual slices in plastic wrap and store in an airtight container.
Similar Recipes
- Classic Chocolate Fudge Brownies
- Dark Chocolate Lava Cakes
- Easy One Bowl Chocolate Cake
- Flourless Chocolate Torte
- Chocolate Chip Cookie Bars
Nutrient Benefits
Chocolate provides antioxidants called flavonoids, which support heart health when consumed in moderation. Eggs add protein and essential vitamins like B12 and choline. Cocoa powder is rich in iron and magnesium, minerals that help with energy production and muscle function. While this cake is a treat rather than a health food, using quality chocolate with higher cocoa content can increase the nutrient density.
The butter provides fat soluble vitamins A and E. If you add walnuts or almonds, you also get omega 3 fatty acids and additional protein.

Chocolate Brownie Cake
Ingredients
- 150 gms Brown Sugar
- 200 gms Butter
- 350 gms Caster Sugar
- 2 tbsp Golden Syrup (see note at the end)
- 4 Eggs
- 250 gms Chocolate - 250 gms
- 200 gms Maida (Plain Flour)
- 1 tsp Baking Powder
- 1/4 cup Cocoa Powder
- 2 tsp Vanilla Essence (or Vanilla Extract)
Optional:
- Walnuts/Almonds - handful, chopped
Instructions
- Heat a pan over low flame.
- Add the butter, caster sugar, brown sugar, golden syrup and chocolate.
- Stir gently until chocolate has fully and sugar has fully melted.
- When the mixture is smooth and lump-free, remove the pan from the flame.
- Break the eggs in a bowl and whisk until light and frothy.
- Add the beaten eggs, vanilla extract, flour, baking powder and cocoa powder to the chocolate mixture.
- Mix well.
- Pour this into a greased cake tin lined with parchment paper.
- Place it into a preheated oven at 180C/360F and bake for 30 to 40 minutes.
- Remove and keep aside to cool for 30 minutes.
- Cut into slices and serve with ice cream if preferred.
Tip: If desired, sprinkle some icing sugar on top before serving.
Note: If golden syrup is not available, then you can use the clear, runny type honey or corn syrup.
Sign up for our newsletter
Add Awesome Cuisine as a Preferred Source
Frequently Asked Questions
Can I use milk chocolate instead of dark chocolate?
Yes, but the cake will be sweeter and less intense in flavor. Reduce the caster sugar by about 50 grams if you use milk chocolate to balance the sweetness.
Why did my cake turn out dry?
Overbaking is the most common cause. Check the cake at 30 minutes and remove it when a skewer comes out with a few moist crumbs. The cake continues to cook slightly as it cools in the tin.
What can I use if I do not have golden syrup?
Substitute with runny honey or light corn syrup. Both provide moisture and help keep the cake tender without adding a strong flavor.
Can I make this cake without a mixer?
Without a doubt. You only need a whisk to beat the eggs until frothy, then a wooden spoon or spatula to fold everything together. The stovetop melting method means no creaming is required.
How do I know when the cake is fully baked?
Insert a skewer or toothpick into the center. It should come out with a few moist crumbs clinging to it, not wet batter. The edges will also start to pull away slightly from the sides of the tin.


1 comment
It looks awesome. Thank you for sharing this recipe.