
Vegetable Vadai, a beloved South Indian snack, combines the goodness of dals (lentils), a medley of vegetables, and aromatic spices to create crispy, golden fritters. These vadai are a flavorful delight and make for an ideal snack, whether serving guests or satisfying your snack cravings.
The heart of this recipe lies in the lentils. You’ll need a cup of Bengal Gram Dal and a cup of Toor Dal, along with a teaspoon of Urad Dal, to add a rich, nutty flavour. After soaking these days for an hour, drain them and combine them with green chillies, ginger, and a pinch of turmeric powder. Grind them into a thick batter, ensuring it’s not too runny.
But what makes Vegetable Vadai truly special is the addition of vegetables. Grated cabbage and carrots add both texture and natural sweetness. Add some curry leaves for a hint of freshness and a touch of cardamom powder for that subtle, unique aroma. Mix all these ingredients into the dal batter.
Now, it’s time to fry this vadai to crispy perfection-heat 250 ml of oil in a frying pan over medium flame. Make small balls from the batter and gently flatten them before carefully adding them to the hot oil. Fry them until they turn a glorious golden brown. Once done, please remove them and let any excess oil drain.
Serve your Vegetable Vadai hot as an appetizer, side with your South Indian meal, or enjoy it with a cup of hot tea. The crispy exterior and soft, flavorful interior make it an instant favourite.

Vegetable Vadai
About the Recipe
This recipe transforms simple lentils into something really special. What I love most is how versatile it is – you can adjust the spice level to your taste and even swap in different vegetables. The soaking and grinding process might seem long, but it’s mostly hands-off time. These vadai freeze beautifully, so you can make a big batch for later. They’re naturally gluten-free and packed with protein from the lentils. Whether you serve them for tea time, as party appetizers, or alongside your main meal, they always disappear quickly.
Why You’ll Love This Recipe
The texture is without a doubt perfect – crispy on the outside and tender on the inside. Each bite gives you different flavors from the ginger, curry leaves, and fresh vegetables. They’re so much better than anything you can buy ready-made. The recipe is quite forgiving too. If your batter is slightly thick or thin, they still turn out great. I’ve made these countless times for guests, and they always ask for the recipe. They’re also budget-friendly since lentils are inexpensive. Plus, you probably have most of the spices in your pantry already. The best part? They taste incredible with just a simple coconut chutney or even ketchup.
Cooking Tips
Don’t add too much water while grinding – you want a thick, moldable batter. Test the oil temperature by dropping a small piece of batter first. If it sizzles and rises immediately, you’re ready to fry. Keep the flame on medium to avoid burning the outside while keeping the inside raw. Wet your hands slightly when shaping the vadai to prevent sticking. Drain them well on paper towels to keep them crispy longer.
Serving and Storing Suggestions
This recipe makes about 12-15 vadai and serves 4-6 people. Total time is about 2 hours including soaking. Serve them hot with coconut chutney, sambar, or mint chutney. They’re also great with evening tea or coffee. Store leftovers in the refrigerator for up to 3 days. Reheat in the oven at 350°F for 5 minutes to restore crispiness. You can also freeze the shaped, uncooked vadai for up to a month.
Similar Recipes
- Masala Vada
- Medu Vada
- Onion Bhaji
- Spinach Pakoras
- Mixed Vegetable Fritters
Nutrient Benefits
These vadai are protein powerhouses thanks to the three different lentils. Bengal gram and toor dal provide fiber that helps with digestion. The vegetables add vitamins and minerals, while ginger aids digestion and has anti-inflammatory properties. Curry leaves contain antioxidants and add wonderful flavor without extra calories. Though they’re fried, the lentils make them more nutritious than regular snacks. The cardamom and turmeric provide additional health benefits and amazing aroma.

Vegetable Vadai
Ingredients
- 1 cup Bengal Gram Dal
- 1 cup Toor Dal
- 1 tsp Urad Dal
- 2 tsp Cabbage (grated)
- 2 tsp Carrot (grated)
- 1/4 inch piece Ginger (finely chopped)
- Curry Leaves
- 2 Green Chilies
- A pinch of Turmeric Powder
- A little Cardamom Powder
- Salt (as per taste)
- 250 ml Oil
Instructions
- Soak Bengal Gram Dal and Toor Dal in water for an hour.
- Drain the soaked dals and transfer them to a blender. Add green chilies, ginger, and grind them into a thick batter. Ensure the batter isn't too runny.
- To the batter, add a pinch of turmeric powder, asafoetida, curry leaves, grated carrot, and grated cabbage. Mix everything thoroughly.
- In a frying pan, heat 250 ml of oil over medium flame.
- Take small portions of the batter, shape them into balls, and gently flatten them before adding to the hot oil.
- Fry the vadai until they turn golden brown and crispy.
- Remove them from the oil and let excess oil drain on paper towels.
- Serve your Vegetable Vadai hot and enjoy!
Sign up for our newsletter
Add Awesome Cuisine as a Preferred Source
Frequently Asked Questions
Can I make the batter ahead of time?
Yes, you can prepare the batter up to 4 hours ahead and keep it in the refrigerator. Just give it a good stir before using. The vegetables might release some water, so you may need to add a pinch of rice flour to thicken it slightly. Don’t keep it longer than 4 hours as the batter might ferment and change the taste.
What if my vadai breaks apart while frying?
This usually happens when the batter is too wet or the oil isn’t hot enough. Add a tablespoon of rice flour or besan to thicken the batter. Make sure your oil is properly heated – it should sizzle when you add the batter. Also, don’t flip them too early. Let one side cook completely before turning.
Can I bake these instead of frying?
While traditional vadai are fried, you can bake them at 400°F for about 20 minutes, flipping halfway through. Brush them lightly with oil before baking. They won’t be as crispy as fried ones, but they’ll still taste good. You can also use an air fryer at 375°F for 12-15 minutes for better results.
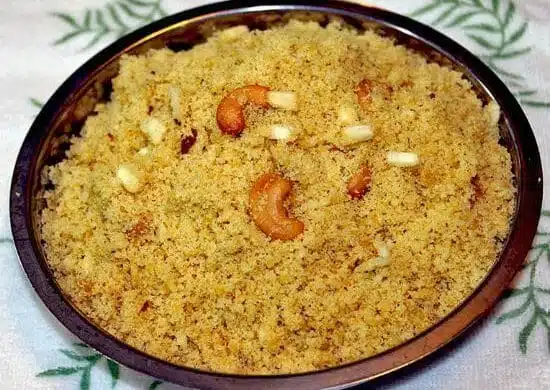
Note: image is for illustration purposes only and not that of the actual recipe.


 19")


 22")
1 comment
Lovely one! I do make this often n so I’ll try with your recipe too 🙂