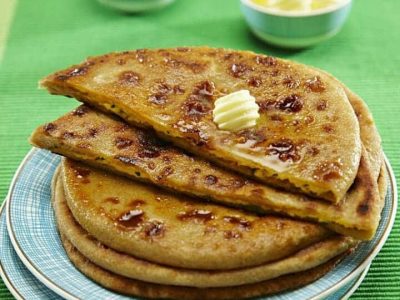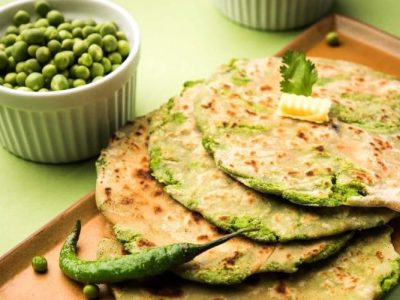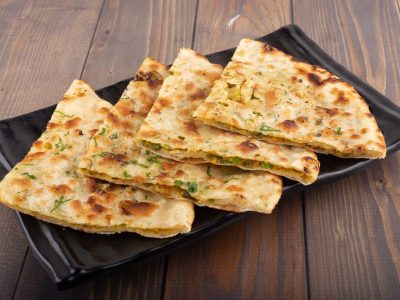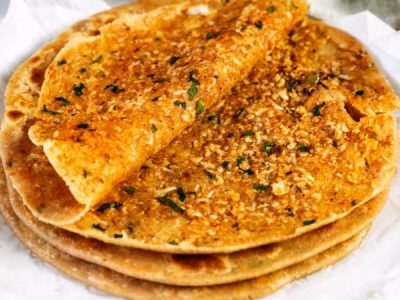
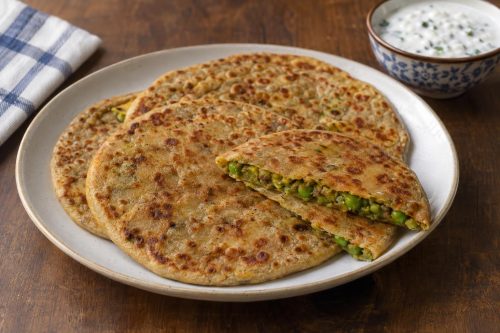
This peas paratha recipe uses fresh shelled green peas as the base for a simple, well-seasoned stuffing. The peas are blanched, drained and mashed with grated coconut, ginger paste, cumin seeds, red chilli powder, garam masala and a little lemon juice. The filling holds together without being wet, which makes rolling much easier. The dough is a straightforward wheat flour dough that needs only a short rest before use. Cooking with a mixture of ghee and oil gives each paratha a richer finish than oil alone. It works well for breakfast or a light meal.
About the Recipe
The filling for this green peas paratha depends on mashing the blanched peas well so there are no large pieces that could tear the dough during rolling. Grated coconut adds a mild texture contrast and helps bind the mixture. The dough uses just enough water to come together as a soft, pliable mass and needs only five to ten minutes of resting before shaping. Rolling the stuffed ball to a quarter-inch thickness keeps the paratha even across the tawa. Brushing the rolled dough with the ghee and oil mixture before adding the filling adds layers and improves the final texture.
Why You Will Love This Recipe
The filling in this peas paratha behaves well because the peas are blanched, drained and mashed before any spice is added. Moisture is controlled from the start, so there is little risk of a soggy or burst paratha if the filling is prepared carefully. The combination of ghee and oil, used both inside the paratha and on the tawa, gives each one a slightly crisp edge with a softer centre. The ingredients are ones most Indian kitchens already stock, and the whole process from filling to cooked paratha takes well under an hour.
Cooking Tips
The most common beginner mistake is adding too much water to the dough, which makes it sticky and hard to roll. Add water in small amounts and stop as soon as the dough is soft and pliable. Drain the blanched peas thoroughly before mashing. Any excess moisture in the filling will cause the paratha to tear during rolling. Keep the rolled paratha at a quarter-inch thickness. Too thin and the filling breaks through; too thick and the centre does not cook evenly on the tawa.
Top Tips
- Drain the blanched peas very well and press out extra moisture before mashing to keep the filling dry.
- Mash the peas mixture until no large whole peas remain, so the stuffed ball rolls out without tearing.
- Add water to the dough gradually and stop as soon as it comes together as a soft, non-sticky dough.
- Let the dough rest covered for the full five to ten minutes before shaping, as this makes it easier to roll.
- Mix the ghee and oil together in a bowl before cooking and use this blend both inside the paratha and around the edges on the tawa.
- Cook on a medium flame throughout. High heat browns the outside before the inside is fully cooked.
Serving and Storing Suggestions
Serve the peas paratha hot off the tawa with raita, as the recipe suggests. A simple onion or cucumber raita works well alongside. Pickle or a green chutney such as a Coriander and Peanut Chutney also pairs well. Leftover parathas can be wrapped in a clean cloth or foil and kept at room temperature for a few hours, or refrigerated and reheated on a dry tawa over a low flame. They keep reasonably well for one day.
Similar Recipes
- Peas Puri (Matar ki Puri)
- Stuffed Vegetable Paratha
- Carrot Potato Paratha
- Moong Dal Paratha
- Sprouts Paratha
Nutrient Benefits
Green peas are a good source of plant protein and dietary fibre, and they also provide vitamins C and K along with folate. Wheat flour contributes carbohydrates for energy. Fresh coriander adds vitamins C and K. The ghee used in cooking provides fat-soluble vitamins A and E.
Peas Paratha
Ingredients
- 1 1/4 to 1 1/2 cups Wheat Flour
- 2 tblsp + 1/4 cup Oil
- 1/4 cup Ghee
- 1 1/2 cups, shelled Peas
- 1/4 cup, grated Coconut
- 1/4 tsp Ginger Paste
- 1/4 tsp Turmeric Powder
- 1/4 cup, finely chopped Coriander Leaves
- 1/4 tsp Red Chilli Powder
- 1/4 tsp Garam Masala Powder
- 1/4 tsp Cumin Seeds (Jeera)
- 1/2 tsp Lemon Juice
- Salt as per taste
Instructions
- Blanch the peas and drain well.
- Transfer to a bowl and add the coconut, ginger paste, turmeric powder, coriander leaves, red chilli powder, garam masala powder, cumin seeds, lemon juice and salt.
- Mix and mash well.
- Keep aside.
- Add a pinch of salt to the wheat flour and sift well.
- Add 2 tblsp of oil and mix.
- Sprinkle some water and mix well a soft, pliable dough.
- Cover with a cloth and keep aside for 5 to 10 minutes.
- Make small-medium balls of the dough and roll them out into 3 to 4 inch circles.
- Mix the ghee and 1/4 cup of oil in a bowl.
- Brush the rolled out dough with this mixture and add 1 or 2 tblsp of the peas mixture.
- Fold and seal the edges. Shape it into a ball.
- Roll it again into 1/4 inch thick paratha.
- Heat a tawa over medium flame.
- Cook the prepared paratha on both sides, applying oil-ghee around the edges, until light brown spots start to appear.
- Remove and serve with raita.
Sign up for our newsletter
Add Awesome Cuisine as a Preferred Source

Frequently Asked Questions
Can I use frozen peas instead of fresh shelled peas for this recipe?
Yes, frozen peas work well. Blanch them just as you would fresh peas, then drain and cool before mashing. Frozen peas tend to release a little more water than fresh ones, so press them firmly in a colander or pat them dry with a cloth before mixing in the spices. This keeps the filling from becoming too wet.
Why does my paratha tear when I roll it after stuffing?
This usually happens for one of two reasons. Either the filling has too much moisture, or the mashing was not thorough enough and large pea pieces are pushing through the dough. Make sure the blanched peas are well drained and mashed until smooth before stuffing. Seal the edges of the dough ball firmly before rolling, and use gentle, even pressure when rolling out to a quarter-inch thickness.
Can I skip the ghee and use only oil?
You can, but the texture and flavour will be noticeably different. The ghee and oil blend used in this recipe gives the paratha its slightly richer finish and helps the edges crisp up on the tawa. Using only oil produces a cooked paratha that is a little plainer in flavour. If you prefer to avoid ghee, use a neutral oil throughout, but expect a simpler result.
How do I know when the paratha is cooked through?
Cook on a medium flame and watch for light brown spots to appear on the underside before flipping. After flipping, press gently with a spatula around the edges. The paratha is ready when both sides have scattered brown spots and the surface looks dry rather than raw or doughy. High heat browns the outside quickly while leaving the filling undercooked, so keep the flame at medium throughout.
Can I prepare the filling or the dough ahead of time?
The peas filling can be made a few hours ahead and kept covered in the refrigerator. Bring it to room temperature before stuffing, as a cold filling can make the dough harder to seal and roll. The dough is best made fresh and used within thirty minutes of resting. If you do make it ahead, cover it tightly with a damp cloth to prevent it from drying out.