 5")
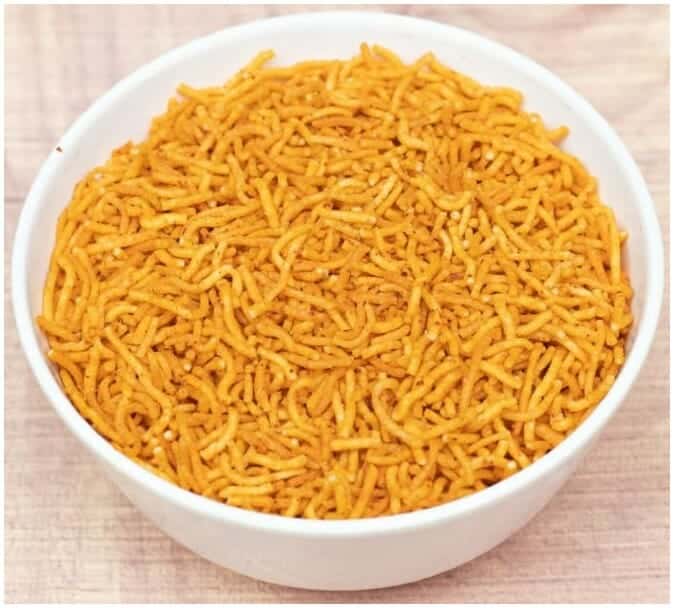
Sev (Omapodi / Ompodi) is a very popular savoury snack across India made with chickpea flour, spices and then deep fried until crispy. Served as a teatime/evening snack, they also make for a great savoury during festival times. This is a variation made with Ragi Flour (Finger Millet Flour) and is equally tasty and delicious as the original one. Sev known to be crispy, a bit of rice flour is added to Ragi to retain the crispiness.
Ragi has been a staple food for centuries in many countries. Originating from Africa, the crop easily grows in harsh weather conditions, making it a wonderful cereal for our Indian climate. Not just being ancient, Ragi is a rich source of many nutrients – primarily its high Calcium content and gluten-free characteristic. It is only of those few cereals that do not undergo processing and hence consumed whole. It has been a staple cereal in states like Karnataka, Tamil Nadu and Maharashtra. With multiple health benefits, it is a wonderful grain well suited for growing kids, diabetics and normal adults too in maintaining good health.
It is a very versatile cereal and is used to make many sweet and savory dishes like Ragi Dosa, Ragi Laddu, Ragi Kanji, Ragi Thenkuzhal, Ragi Kozhukattai, Ragi Halwa, etc.
 6")
About the Recipe
This Ragi Sevi recipe is perfect for anyone wanting to enjoy traditional flavors while eating healthier. Ragi is packed with nutrients and gives the sev a beautiful color and nutty taste. The carom seeds aren’t just for flavor – they help with digestion too. What I love about this recipe is how it transforms simple pantry ingredients into something special. It’s great for beginners because the technique is straightforward, and even if your first batch isn’t perfect, it’ll still taste amazing. Your family will be impressed with this homemade treat.
Why You’ll Love This Recipe
You’ll fall in love with how this snack combines health and taste perfectly. The ragi gives it a wonderful nutty flavor that’s different from regular sev. The carom seeds add that special something that makes it truly addictive. I love making big batches because it stores so well – perfect for unexpected guests or when you need a quick snack. The texture is just right – crispy but not too hard. Kids love it, adults appreciate the health benefits, and it’s way better than store-bought versions. Plus, your kitchen will smell without a doubt amazing while you’re frying these golden strands.
Cooking Tips
The dough consistency is key – it should feel soft but not sticky. If it’s too dry, your sev will break while squeezing. Test the oil temperature by dropping a small piece of dough first. Don’t squeeze too much dough at once or the oil temperature will drop. Keep the flame medium throughout to get that perfect golden color without burning. If you don’t have an omapodi maker, a fine-holed strainer works too, though the shape might be different.
Serving and Storing Suggestions
This recipe serves 4-6 people and takes about 45 minutes to prepare and cook. Serve it fresh with hot tea or coffee for the best experience. Store in an airtight container for up to 3 weeks – though it rarely lasts that long in my house. You can also pack small portions in zip-lock bags for kids’ lunch boxes. The sev tastes great on its own or mixed with other savory snacks for a trail mix.
Similar Recipes
- Regular Omapodi
- Ragi Murukku
- Besan Sev
- Rice Flour Chakli
- Multigrain Sev
Nutrient Benefits
Ragi is a powerhouse of nutrition, rich in calcium, iron, and fiber. It helps regulate blood sugar levels and is great for bone health. The carom seeds aid digestion and have antibacterial properties. Unlike refined flour snacks, this version provides sustained energy without sudden sugar spikes. The combination of different flours creates a complete protein profile, making it a smarter snacking choice for the whole family.
 7")
Ragi Omapodi (Ragi Sev)
Ingredients
- 1 Cup Ragi Flour
- 1/4 Cup Bengal Gram Flour
- ¼ Cup Rice Flour
- 2 tsp Carom Seeds (Omam)
- Salt to Taste
- Oil for deep frying
Instructions
- Soak the omam in water for a while and grind them.
- Filter the omam water by adding little water to it.
- Take a bowl, add all the flour, salt, omam water and knead them to a fine dough mixture. It should be supple and not very hard or dry.
- Heat a kadai under medium flame.
- Add oil for deep frying.
- Add some of the dough to an ompodi maker.
- Heat oil in a deep pan over medium flame.
- Squeeze the ompodi maker over the hot oil.
- Fry till light golden brown and remove the excess oil using kitchen tissues.
- When it is cooled down, transfer them into an air tight jar
Sign up for our newsletter
Add Awesome Cuisine as a Preferred Source
Frequently Asked Questions
Can I make this without an omapodi maker?
Yes. You can use a fine-mesh strainer or even a clean plastic bottle with small holes poked in the cap. The shape might be slightly different, but it’ll taste just as good. Some people even use a piping bag with a small round tip.
Why is my sev breaking while squeezing from the maker?
Your dough is probably too dry. Add a tablespoon of water at a time and knead again until it becomes pliable. The dough should feel smooth and slightly sticky to your touch. Room temperature water works better than cold water for binding.
How do I know when the oil is ready for frying?
Drop a small piece of dough into the oil. It should sizzle and come up slowly without browning immediately. If it browns too fast, the oil is too hot. If it sinks and doesn’t bubble much, wait a bit longer for the oil to heat up.
Can I bake this instead of deep frying?
While traditional sev is deep-fried for that signature texture, you can try baking at 180°C for 15-20 minutes. Turn them halfway through cooking. The texture will be different but still tasty. Brush lightly with oil before baking for better results.