Food lovers today don’t just read recipes – they watch them.
Both short-form and YouTube-style recipe videos help food bloggers connect with their audience. These engaging formats bring recipes to life, showing every step visually and helping bloggers grow their platforms faster.
This guide will walk you through everything you need: from planning your video concept and setting up your kitchen studio, to filming clear shots, editing like a pro, and promoting your content effectively.
Whether you’re starting out or refining your skills, these practical steps will make the process approachable.
By the end, you’ll know how to make recipe videos that look professional (and without the need for expensive equipment).
It’s time to turn those recipe notes into mouthwatering visuals!

A Woman Smiling at the Camera
Step 1: Plan Before You Press Record
Before setting up your camera, plan every detail of your recipe video.
Storyboarding and scripting are crucial because they help you stay organized, ensuring the final product feels smooth and professional.
Each video should contain a single recipe with clear visual steps to ensure viewers remain engaged and can follow the recipe easily.
Plan before you begin by writing a quick outline to structure the video flow:
- An engaging intro (e.g., why this dish?).
- Ingredient listing (while showing them visually on-screen).
- Step-by-step cooking demonstrations (filmed clearly from above or angled close-ups).
- End by plating the dish beautifully.
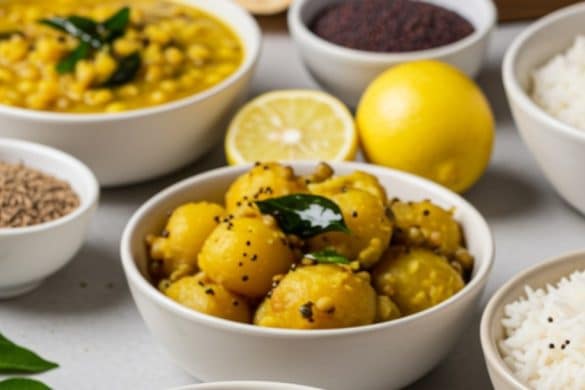
For instance, for a butter chicken dish, you could film these key steps:
- Introducing the dish you’re about to make.
- Providing viewers with an ingredients list.
- Marinating chicken in yogurt, ginger-garlic paste, fresh herbs, and spices.
- Cooking onions, tomatoes, cream, and spices to make the gravy base.
- Combining the cooked chicken with the gravy.
- Plating up and garnishing with cilantro.
Keep videos under two minutes for Instagram Reels or TikTok formats, but aim for longer durations on platforms like YouTube, where tutorials thrive.
Pro Tip: Think of your video like a recipe card. It should be simple, visual, and easy to follow.
Step 2: Set Up Your Kitchen Studio
Your kitchen doubles as your studio, so setting it up correctly ensures your recipe video looks clean and professional.
Small adjustments in lighting, camera positioning, and styling can elevate the visual appeal dramatically.
Lighting Tips
Natural light is your best friend. So, position yourself near a window to let soft daylight enhance the colors of your ingredients.
If natural light isn’t available or sufficient, use a ring light to evenly illuminate your setup while avoiding harsh shadows that could distract viewers from the food itself.
Camera Setup
A steady shot is essential for clarity. Use a phone tripod or an overhead mount to keep your camera stable while capturing consistent angles.
Consider recording in landscape orientation if creating long-form YouTube videos, but switch to portrait mode for vertical platforms like Instagram Reels or TikTok.
Background Styling
Keep backgrounds neutral yet engaging with boards or mats that complement rather than compete with the dish’s appearance.
For instance, a white plate on a dark surface often highlights vibrant dishes beautifully without cluttering the frame visually!
Step 3: Record Your Cooking Process
Recording is where all your planning comes together. Whether you’re showing the entire cooking process or pairing clips with creative overlays, choosing the right tools and techniques ensures professional results.
You don’t need expensive gear to create high-quality videos. A good smartphone or DSLR camera works perfectly for capturing crisp visuals of your cooking process.
And for additional tutorials, narrations, or demo clips (such as ingredient cards), try using a video screen recorder.
You can create professional demos in Canva to make digital recipe demonstrations more interactive. By using their free video screen recorder for content marketing, you can easily enhance your reach.
And screen recording helps when creating voiceovers or step-by-step instructions outside of live filming. For instance, you could build eye-catching recipe cards while overlaying footage of completed dishes on-screen during edits.
This approach gives viewers both clarity and creativity by combining visual cues directly into their learning experience.
Quick Tip: Always record in bright light and test audio clarity before filming the full recipe. Small checks avoid big re-recording frustrations later!
Step 4: Frame and Shoot Like a Food Photographer
The way you frame your shots transforms simple cooking footage into something visually compelling.
Paying attention to angles, movement, and composition makes a big difference in how viewers perceive your recipe video.
Show Angles That Work Best
Certain angles highlight specific parts of the process better.
Use top-down views for preparation steps like chopping or mixing; this perspective keeps everything in focus while clearly showing what’s happening.
A 45° angle works great for plating or capturing vibrant details up close, like the textures of fresh herbs or golden crusts.
For final presentations or that perfect “bite” moment, go with eye-level shots – they feel more personal and inviting.
Keep the Motion Smooth
Avoid unnecessary zooming or shaky movements by keeping motions intentional and steady.
If handheld shooting is unavoidable, use slow pans to maintain smoothness without disorienting viewers.
Use Composition Techniques
Apply the rule of thirds to balance your frame-position key elements off-center to create visual interest while leaving space uncluttered around them.
Between takes, ensure transitions remain clean so each clip flows naturally into the next.
Step 5: Edit for Flow and Flavor
Editing pulls all your footage together, transforming raw clips into an engaging recipe video.
The key is maintaining a smooth, visually appealing flow while adding elements that enhance the viewing experience.
Keep Edits Tight
For short videos on platforms like Instagram or TikTok, keep individual shots no longer than three seconds to hold attention spans.
Trim any unnecessary pauses or redundant footage to maintain momentum throughout the video.
Add Enhancements
Include text overlays for ingredient lists and cooking times – these give viewers quick references without pausing the video.
Background music can set the tone; pick something upbeat for fun recipes or mellow tunes for relaxing dishes.
And don’t forget subtitles! They improve accessibility for all audiences and boost SEO performance on social media platforms.
Use the Right Tools
Use beginner-friendly apps to simplify editing processes while achieving polished results.
Optional Pro Touch: Add branded intro/outro sequences consistently in every video – this reinforces recognition across your blog or channel.
Step 6: Optimize and Upload
Once your video is edited, focus on the presentation. Optimization ensures it gets noticed while reaching the right audience across platforms.
Start by naming your video files descriptively. Instead of generic titles like “Recipe Video 1,” use something specific, such as “How to Make Masala Dosa in 3 Easy Steps.” Clear, keyword-rich names help with searchability.
For thumbnails, design visually striking images that showcase the final dish beautifully – tools like Canva make this easy without needing advanced graphic design skills.
Upload to multiple channels for broader reach: YouTube for detailed tutorials, Instagram Reels for quick bites of content, and Pinterest Idea Pins to inspire DIY cooks visually.
Always include blog links in descriptions or captions to drive traffic back to your website.
And use call-to-action overlays like “Visit my blog for the full recipe!” wherever possible.
SEO Tip: Keywords matter! Add them thoughtfully in captions, alt text (for images), and tags on videos. These improve visibility significantly online.
Step 7: Promote and Engage
Uploading your video is only half the job. To maximize its reach, focus on promoting it creatively and interacting with your audience to build engagement.
Post Teasers
Use Instagram Stories to post short, enticing snippets from your video.
Highlight moments like sizzling ingredients or the final plated dish. And add stickers, polls, or questions to make Stories more interactive and drive viewers toward the full content.
Repurpose Snippets
Take engaging segments of your recipe – like a satisfying stir or garnishing moment – and repurpose them as Shorts for YouTube or Reels on Instagram.
These bite-sized videos grab attention while linking back to longer versions.
Encourage Comments and Q&A Sessions
Actively invite feedback by encouraging viewers to leave comments under your posts, such as: “Have any dosa batter questions? Drop them below!”
Answering these builds community trust and increases interaction with new followers.
Collaborate Creatively
Team up with fellow food bloggers or home chefs for guest features, shared content exchanges, or even challenges that introduce each other’s audiences organically!
Bonus Section: Common Mistakes to Avoid
Even small missteps can affect how professional your recipe video appears.
So, avoid these common pitfalls to ensure your content shines:
- Shaky camera work or poor lighting that distracts from the food’s appeal.
- Background noise overpowering your instructions or ruining ambiance.
- Lengthy intros that lose viewers before reaching the actual recipe steps.
- Forgetting to include branding elements like a logo, watermark, or blog link for better recognition and traffic-building opportunities.
Keep these in mind, and you’ll create polished videos that captivate audiences every time.
Conclusion: Your Kitchen, Your Studio
A fancy setup isn’t necessary to captivate an audience. You don’t need a studio to make people hungry. All you need is good light, a steady hand, and a story worth sharing.
Start with simple recipes that feel manageable and build your skills over time.
Every recipe video you create is an opportunity to refine your process while connecting with viewers.
With practice and passion, your kitchen can transform into the perfect space for sharing delicious ideas!
—————————————-
Photo by Ron Lach : https://www.pexels.com/photo/a-woman-smiling-at-the-camera-8357241/