Paneer Pulao did not come easily to me. The first time I made it, I skipped the cornflour in the paneer mixture because I thought it was unnecessary, and the balls fell apart the moment they hit the oil. What I ended up with was a pan full of crumbled, half-fried paneer floating in oil and a rice pot I had not paid enough attention to. That batch was a write-off.
The version I make now is much more reliable. I never skip the cornflour, and I always dissolve the ginger garlic paste in a little water before adding it to the pan, because dropping thick paste into hot oil with whole spices in it sends everything into a spluttering mess. The detail that keeps me coming back to this recipe is the milk sprinkled on top of the half-cooked rice before covering it. That small step, maybe four tablespoons, changes the way the grains finish, making them softer without turning sticky.
About the Recipe
All the ingredients here are easy to find at any Indian grocery store, and most are probably already in your kitchen. The rice needs 30 minutes of soaking, so the actual active cooking time is closer to 35 to 40 minutes once that is done. I tend to make this on a Saturday afternoon when I want something more special than plain rice but do not want to spend the whole day cooking. The paneer balls can be fried ahead of time, which means the rice can have your full attention when it matters.
Why you will love this recipe
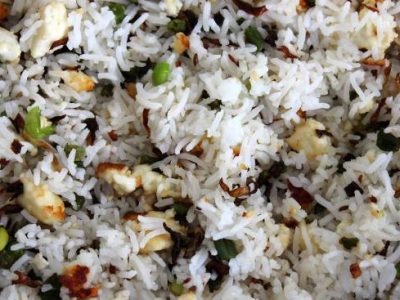
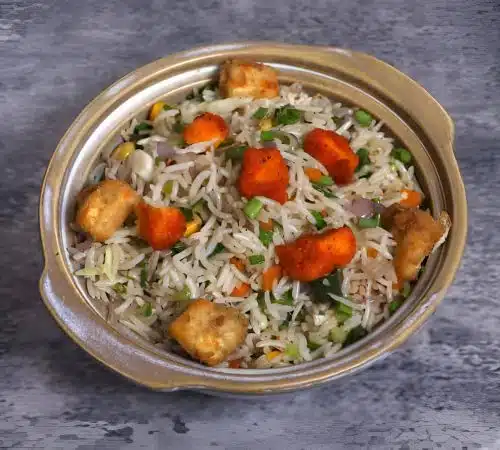
The fried paneer balls are the real reason to make this. They are seasoned with red chilli powder and bound with cornflour, then fried until golden, so the outside has a slight crispness while the inside stays soft. Placed on top of the finished rice rather than stirred in, they hold their shape and texture all the way to the table.
The rice itself is cooked in vegetable stock with butter and a squeeze of lemon, which gives it more depth than plain water would. Whole spices, cinnamon, cardamom, cloves, and bay leaves, go in at the start and scent the oil before anything else touches the pan. That base is what makes the rice taste properly layered rather than flat.
Cooking Tips
The most common beginner mistake here is adding the ginger garlic paste straight to the pan without diluting it first. It sticks, it burns, and it makes the whole base bitter. Dissolve it in two to three tablespoons of water before you add it. The other issue is heat management during the dum cooking stage.
Once the water reduces to the level of the rice, turn the flame down properly before covering with the damp cloth. If the heat is too high, the bottom layer of rice will catch and dry out while the top is still undercooked.
Top Tips
- Soak the rice for the full 30 minutes, not less. Under-soaked basmati takes longer to cook and often turns out uneven, with some grains hard in the centre.
- Use a heavy-bottomed pan for the rice. A thin pan will create hot spots at the base, which is where the rice is most likely to scorch during the dum stage.
- The damp cloth under the lid is not optional. It creates a seal that traps steam and cooks the top layer of rice without needing to add more water.
- Fry the paneer balls in batches rather than all at once. Overcrowding the oil drops the temperature and the balls absorb more oil instead of crisping up.
- If you do not have vegetable stock, water works, but add a little extra salt to compensate for the flavour you are losing.
- The lemon juice goes in with the stock, not at the end. Adding it early gives it time to mellow out so it does not taste sharp against the rice.
Serving and Storing Suggestions
This recipe serves 3 to 4 people as a main dish with a simple raita or plain yoghurt on the side. Total time from soaking to serving is about 70 minutes, with roughly 35 to 40 minutes of active work. Leftovers keep well in the refrigerator for up to two days in an airtight container.
When reheating, sprinkle a tablespoon of water over the rice before warming it on low heat or in a microwave, so the grains loosen up rather than dry out. I would store the paneer balls separately if possible, so they do not go soft sitting in the rice.
Similar Recipes
- Matar Pulao
- Vegetable Biryani
- Mushroom Pulao
- Kashmiri Pulao
- Jeera Rice
Nutrient Benefits
Paneer brings a solid amount of protein and calcium to this dish, which makes it more filling than a plain rice preparation. Because the paneer is deep fried rather than added raw, some of the fat content is higher than in a curry-based paneer dish, so portion size matters if you are watching oil intake. The vegetable stock adds some micronutrients depending on what went into it, and basmati rice, particularly when soaked and drained, has a lower glycaemic index than many other white rice varieties.
Paneer Pulao
Ingredients
- 1 3/4 cups Basmati Rice
- 100 gms Paneer
- Salt to Taste
- 1/2 tsp Red Chilli Powder
- 2 tsp Cornflour
- Oil - 1 tbsp plus some more for frying
- 2 tsp Cinnamon Powder
- 2 Green Cardamoms
- 4 Cloves
- 4 Bayleaves
- 3 tbsp Onions (sliced)
- 3 tbsp Ginger Garlic Paste
- 3 3/4 cups Vegetable Stock or Water
- 1 1/2 tsp Salt
- 1/2 cup Butter
- 1/2 Lemon
- 4 tbsp Milk
Instructions
- Soak the rice in sufficient water for 30 minutes.
- Drain and keep aside.
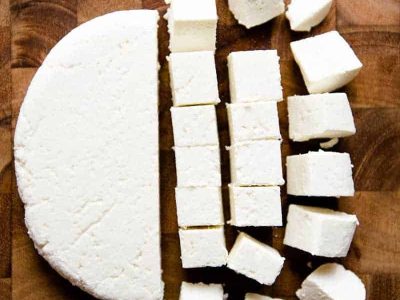
- Mash the paneer.
- Add salt, red chilli powder and cornflour.
- Mix well and make small balls of the mixture.
- Heat oil in a pan and deep fry the paneer balls to a light golden brown colour.
- Remove and keep aside.
- Heat oil in a pan.
- Add the whole spices and saute till they crackle.
- Add sliced onions and stir fry to a golden brown colour.
- Add ginger garlic paste dissolved in water.
- Stir vegetable stock and bring to a boil.
- Add salt, butter and juice of half a lemon.
- Add the rice and cook on medium heat, stirring occasionally.
- When the water is reduced to the level of the rice, sprinkle milk on top.
- Cover with a damp cloth and cook on low heat for 15 minutes or until the rice is cooked.
- Remove from heat.
- Garnish with fried paneer balls.
- Serve hot.
Sign up for our newsletter
Add Awesome Cuisine as a Preferred Source

Frequently Asked Questions
My paneer balls broke apart when I was frying them. What went wrong?
This almost always comes down to skipping the cornflour or not mixing the paneer thoroughly enough. The cornflour acts as a binder. Make sure you mash the paneer until it is completely smooth with no lumps before adding anything else, and use the full two teaspoons of cornflour. Also check that the oil is hot enough before you add the balls. If the oil is lukewarm, the outside does not set quickly and the balls fall apart.
Can I use store-bought paneer straight from the packet?
Yes, but if it is refrigerator-cold and very firm, grate it instead of trying to mash it by hand. Cold paneer does not mash smoothly and you will end up with a lumpy mixture that does not hold together well. Letting it sit at room temperature for 20 minutes before mashing helps.
The rice at the bottom of the pan was dry and slightly stuck. Did I do something wrong?
That usually means the heat was too high during the dum stage. Once you cover the pan with the damp cloth and lid, the flame should be as low as it will go. If your stove runs hot even on the lowest setting, place a flat griddle or tawa under the pot to create some distance from the flame.
Can I make the paneer balls ahead of time?
Yes, and I often do. Fry them, let them cool completely, then store them in a single layer in a covered container at room temperature if you are using them within a couple of hours, or in the refrigerator if it will be longer. Warm them in a dry pan for a minute before placing on the rice so they crisp up again slightly.
I do not have vegetable stock. Can I use chicken stock or just plain water?
Plain water works fine, just add a little extra salt to make up for it. Chicken stock will change the dish from vegetarian to non-vegetarian, so skip that if you are cooking for people who do not eat meat. A small piece of vegetable bouillon cube dissolved in water is a reasonable middle ground if you have it.