
Punjabi Kadi with Pakora turns up on tables across North India with reassuring regularity. The kadi is a besan and yogurt curry, cooked low and slow until it thickens and loses any raw flour taste. The pakoras are made separately, fried until crisp, then added at the end so they absorb the curry without turning completely soft. Together, the two make a dish that is filling, well-spiced and very satisfying with plain steamed rice or roti. This classic of Punjabi cuisine is worth learning properly.

About the Recipe
The recipe has two separate workstreams that come together at the end. The pakora batter uses besan with baking powder, cumin, green chilli, ginger and spices, and it must be thick enough to hold its shape when dropped into oil.
The kadi base starts with whole spices, then builds with onion, tomato and the yogurt-besan mixture. That mixture needs to be whisked smooth and rested before it goes into the pan. Kasuri methi goes in near the end and gives the curry a distinctive finish.
Neither component requires difficult technique. Both reward attention to heat and timing.
Why You Will Love This Recipe
The combination of a tangy, spiced kadi with pakoras that have softened slightly at the edges while staying substantial inside is genuinely satisfying. The besan thickens the curry naturally and gives it body, while the yogurt keeps it from feeling heavy.
If you enjoy cooking with besan, this recipe makes excellent use of it across both the pakoras and the curry base.
Cooking Tips
The most common beginner mistake is adding the yogurt mixture over high heat, which causes it to split and curdle. Keep the heat low and stir continuously once the yogurt goes in.
The pakora batter must be thick, not pourable. A thin batter produces pakoras that spread in the oil and turn greasy.
Whisk the yogurt, besan and water together thoroughly, then rest the mixture for 30 minutes before using it. This helps the batter hydrate fully and the kadi cook more evenly.
Top Tips
- Whisk the yogurt, besan and water until completely smooth with no lumps before setting it aside to rest for 30 minutes.
- Keep the pakora batter very thick so each pakora holds its shape when dropped into the oil with a spoon.
- Add the yogurt mixture to the pan only on low heat and stir without stopping until it comes to a boil.
- Simmer the kadi for at least 10 minutes after it boils to cook out the raw besan taste before adding the pakoras.
- Add kasuri methi in the last 5 minutes of cooking, not earlier, so its flavour stays distinct.
- Add pakoras just 5 minutes before serving so they absorb the curry without becoming completely soft.
Serving and Storing Suggestions
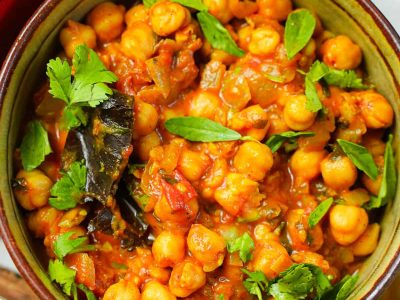
Punjabi Kadi with Pakora is best served hot with steamed rice or roti. It also works well alongside a simple Punjabi Chana Masala if you are cooking a larger spread.
Leftovers keep in the refrigerator for up to two days. Reheat gently on low heat with a splash of water, as the kadi thickens considerably when cold. The pakoras will be softer after storing, which many people find just as enjoyable.
Similar Recipes
Nutrient Benefits
Besan is a reasonable source of plant protein and dietary fibre. Yogurt adds calcium and protein to the kadi. Served with rice or roti, this dish makes for a filling, protein-rich meal.

Punjabi Kadi with Pakora
Ingredients
- For Pakoras:
- 1 cup Besan (chickpea flour)
- 1/2 tsp Baking powder
- 1/2 tsp Cumin seeds
- 1 , finely chopped Green chilli
- 1/2 tsp, grated Ginger
- 1/4 tsp Turmeric powder
- 1/2 tsp Red chilli powder
- Oil for cooking
- Salt as per taste
- For Kadi:
- 1/2 cup Besan (chickpea flour)
- 1 cup, chopped Onion
- 1/2 cup, chopped Tomato
- 1 tsp Ginger and garlic paste
- 2 , broken Dry red chillies
- 1 sprig Curry leaves
- 1 tsp Mustard seeds
- 1/2 tsp Cumin seeds
- 1 (one inch) Cinnamon piece
- 2 , whole Cloves
- 1/2 tsp Turmeric powder
- 1 tsp Red chilli powder
- 2 cups, whisked Yogurt
- 1 tsp Kasuri methi powder
- Oil as required
- Salt as per taste
Instructions
- Mix all the ingredients for pakora in a bowl.
- Make a very thick batter with water.
- Drop into oil with a spoon to make pakoras.
- Fry till crispy. Drain on paper towels and set aside.
- Whisk yogurt, 3 cups water, turmeric powder, salt, red chilli powder and besan. Blend till smooth.
- Set aside for 30 minutes.
- Add garlic and ginger paste and 2 tsp water to prevent sticking to pan.
- Fry on low heat for 2 minutes, stirring frequently. Add turmeric powder, garam masala, red chilli and salt.
- Add tomatoes and cook till soft.
- Add the yogurt mixture and keep stirring till it comes to a boil.
- Simmer for 10 minutes stirring frequently. Add kasuri methi and cook for a further 5 minutes.
- Add pakoras and simmer for 5 minutes.
- Garnish with coriander leaves and serve with rice or roti.
Sign up for our newsletter
Add Awesome Cuisine as a Preferred Source

Frequently Asked Questions
Why does my kadi curdle when I add the yogurt mixture?
Curdling happens when the yogurt mixture hits heat that is too high too quickly. Always add it over low heat and stir continuously from the moment it goes into the pan. Whisking the besan thoroughly into the yogurt and water before cooking also helps, as the besan steadies the mixture during heating.
Can I bake the pakoras instead of frying them?
The recipe calls for frying, which gives the pakoras their crisp exterior. Baking will produce a softer result and the texture will be noticeably different, especially after the pakoras are simmered in the kadi. If you prefer less oil, shallow frying in a flat pan is a practical middle ground, though the shape will be less even.
How thick should the pakora batter be?
Thick enough that it does not drip off a spoon easily. When you pick up a spoonful and hold it over the bowl, it should fall slowly in a heavy clump rather than pour. If it pours, add a little more besan. A thin batter produces flat, greasy pakoras that will not hold up in the curry.
Can I use sour yogurt for the kadi?
Yes, and slightly sour yogurt works well here because it gives the kadi its characteristic tangy flavour. Fresh yogurt that is not sour at all will produce a milder curry. If your yogurt is very fresh and sweet, the kadi may taste a little flat. Taste and adjust salt and red chilli powder accordingly.
How do I know the kadi is ready before I add the pakoras?
The kadi should have simmered for at least 10 minutes after coming to a boil, with kasuri methi added and cooked for a further 5 minutes. By this point it should have thickened noticeably, the raw besan smell should be gone and the oil should have started to separate slightly at the surface. Only then add the pakoras and simmer for a final 5 minutes.

perfect.. enjoyed and the best ever i cooked