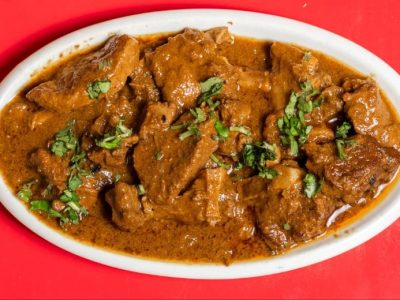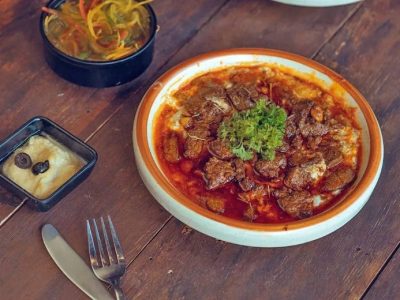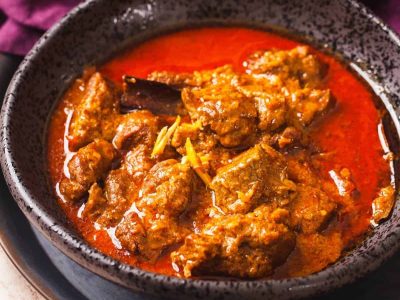
Kerala Mutton Masala is one of those recipes I come back to whenever I have mutton in the fridge and the weekend finally gives me a couple of unhurried hours. I do not make this on a Tuesday night — it asks for a bit more attention than that, and it deserves it. What keeps me returning to it is the masala paste.
Grinding whole coriander seeds, red chillies, ginger, and garlic together with a handful of other spices fills the kitchen with a smell that is genuinely hard to walk away from. The moment that paste hits the hot oil and starts frying, the sizzle and the aroma together tell you something good is coming. That detail — the freshly ground paste rather than store-bought powder — is what makes this version feel like mine.
About the Recipe
Every ingredient here is either a pantry staple or available at any Indian grocery without a hunt. The whole spices — coriander seeds, cinnamon, cloves, cardamom — are things most home cooks already keep. Fresh coconut pieces add texture at the end, and if you cannot find them, desiccated coconut works in a pinch. The pressure cooker does the heavy lifting for the mutton, so the active cooking time is manageable. I would make this on a Sunday, serve it with plain rice for lunch, and count on the leftovers tasting even better the next morning.
Why you will love this recipe
The two-stage coconut milk method is the real reason this curry gets made again and again. Thin coconut milk goes in before pressure cooking and keeps the mutton moist as it cooks under pressure, while thick coconut milk stirred in at the end gives the gravy body and a quiet richness without being heavy.
The freshly ground spice paste means you get a more direct hit of flavour from the coriander and whole spices than a ready-made powder could give. And then there is the finishing step — coconut pieces and curry leaves fried in ghee, poured over the top. The nutty, slightly crisp coconut landing on the gravy right before serving adds something that no amount of extra stirring could replicate.
Cooking Tips
The most common beginner mistake here is adding the thick coconut milk too early. If it goes in before pressure cooking, it will split and leave the gravy looking grainy and oily. Always wait until the cooker has cooled, the lid is off, and the curry is back on low heat before stirring it in. Also, do not rush the onion browning step — pale onions make a noticeably thinner, less flavourful base. Give them the full time they need over medium heat until they are genuinely golden brown.
Top Tips
- Grind the whole spices with just enough water to get a smooth paste — too much water makes the masala watery and it will not fry properly in the oil.
- Let the pressure cooker cool completely before opening. Rushing this step with a quick release can make the mutton tougher.
- Keep the flame on low once you add the thick coconut milk. High heat after this point will cause the milk to curdle.
- Fry the coconut pieces and curry leaves in ghee just before serving, not ahead of time. The texture is noticeably better when they are fresh and still slightly crisp.
- If your mutton pieces are large, ask the butcher to cut them small — roughly 2 to 3 cm pieces. They cook through more evenly under pressure.
- Taste for salt after the thick coconut milk goes in, not before. Coconut milk can soften the saltiness, so you may need a small adjustment at that final stage.
Serving and Storing Suggestions
This recipe serves 3 to 4 people. Preparation including grinding the masala takes about 20 minutes, with another 30 to 40 minutes of cooking time. Serve hot with plain cooked rice or Kerala parotta. Leftover curry keeps well in the refrigerator for up to 2 days — reheat on low flame and add a splash of water if the gravy has thickened overnight. I always find it tastes richer the next day, once the spices have had time to settle.
Similar Recipes
- Kerala Chicken Curry
- Mutton Rogan Josh
- Chettinad Mutton Curry
- Kerala Beef Fry
- Mutton Korma
Nutrient Benefits
Mutton is a reasonable source of protein and iron, which makes this more than just a weekend indulgence. Coconut milk contributes healthy fats, and the whole spices — particularly coriander seeds and black pepper — have long been used in traditional Indian cooking for their digestive properties. Curry leaves add a small amount of calcium and are rich in antioxidants. This is not a light dish, but the ingredients carry genuine nutritional weight beyond flavour.

Aattirachi Curry (Kerala Mutton Masala)
Ingredients
- Mutton - 750 gms
- Coconut Milk - 1/2 cup thick + 1/2 cup thin
- Coconut Oil - 3 tblsp
- Coriander Seeds - 2 to 3 tblsp
- Red Chillies - 4
- Garlic - 4 cloves
- Ginger - 1 half inch piece
- Cardamom - 1
- Coconut Pieces - few
- Curry Leaves - handful
- Cloves - 2
- Peppercorns - 1/4 tsp
- Cinnamon - 1 stick
- Onion - 1 chopped
- Turmeric Powder - 1/2 tsp
- Water - 1 cup
- Ghee - 1/2 tblsp
- Salt as per taste
Instructions
- Heat 1 tblsp of oil in a pan over medium heat.
- Add coriander seeds, red chillies, garlic, ginger, cloves, cinnamon, cardamom and peppercorns.
- Fry for a minute and grind them into a paste adding 1/4 cup of water.
- Heat the remaining oil in a pressure pan.
- Fry the onions till golden brown.
- Add the ground masala and stir for 2 minutes.
- Add the muttin pieces, salt and turmeric powder.
- Stir fry for 3 to 5 minutes.
- Add the thin coconut milk and stir well.
- Close the pan and pressure cook for 8 to 10 minutes over low heat.
- Remove the pan from heat and keep aside to cool.
- Once cool, remove the lid and add the thick coconut milk.
- Return it to the heat and cook till the gravy becomes thick, over low flame.
- In an another pan, heat ghee for a minute.
- Stir fry the coconut pieces and curry leaves till coconut turns golden brown.
- Pour this over the curry.
- Serve hot with cooked rice.
Sign up for our newsletter
Add Awesome Cuisine as a Preferred Source

Frequently Asked Questions
My gravy looks oily and separated after pressure cooking. What went wrong?
This usually happens when thick coconut milk is added before pressure cooking instead of after. Thick coconut milk cannot handle high pressure and heat — it breaks and the fat separates out. Always add it after the cooker has cooled, the lid is off, and the curry is back on a low flame.
Can I make this without a pressure cooker?
Yes, but the cooking time changes greatly. Use a heavy-bottomed pot with a lid, add a little extra water, and simmer on low heat for 60 to 90 minutes until the mutton is tender. Check every 20 minutes and top up water as needed so the base does not dry out and burn.
The masala paste did not fry properly and the curry smells raw. What happened?
The paste needs enough time in hot oil to cook through — at least 2 full minutes of frying over medium heat, stirring constantly. If the oil was not hot enough or the pan was crowded, the paste steams rather than fries, which leaves a raw smell. Next time, make sure the oil is shimmering before the paste goes in.
Can I use canned coconut milk instead of fresh?
Canned coconut milk works well here. Use the top layer of a can (the thick, creamy part) as the thick coconut milk, and dilute the remaining liquid with a little water for the thin portion. Shake the can well before opening if you want a consistent mix for the thin milk.
How do I know when the gravy has thickened enough at the end?
After adding the thick coconut milk, cook on low heat and stir occasionally. The gravy is ready when it coats the back of a spoon and no longer looks watery. It should take roughly 8 to 12 minutes depending on how much liquid was in the pot after pressure cooking. Do not rush this on high heat.